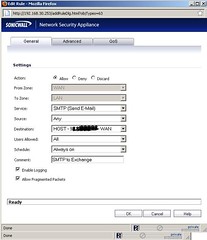
How to create a URL file

Could Not Edit .url file Properties

How to Create a URL file to use as a shortcut

I encountered an issue recently that was very unique and out of the ordinary. A client had an application that must be started from an IE URl shortcut. Now, before i get to the problem, I admit there is probably another way to have fixed this issue but I was looking for the fastest method possible, I would have really liked to find the real cause of the problem, I found a way around it.

This application, although ti uses IE to start, has an installer. That installer is large and installed a boat load of files. Normally, the installation works without issues, as did this installation. During the installation the url to the web server must be entered. It was copied and pasted correctly.

The URL was wrong however and I found out later that another IT person tried to install the application and possibly entered it wrong and the problem was that the URL could not be edited, nor replaced from a working copy form another machine.

 .url file properties could not be changed or modified

Deleting then replacing the file form another system did not work. The incorrect url that was par of the properties of the url shortcut would just revert and change back to the incorrect setting. Simply, the h in http was missing. One would think just edit the properties of the URL file and add an h, but that just did not work. The h would always be missing. Even when deleting and replacing the file with a working shortcut from another machine, the h would disappear.

The location of the file was the Public Desktop. In the user’s own Desktop folder , the file would work and not change back to the incorrect version. In the Public Desktop folder however, the file would be copied from a working machine, but when tested the link would not work.

What finally worked was to open the page in Internet explorer and creating a new shortcut url link. The way to create a .URL file however is not by dragging the address bar of IE to the folder location or the desktop but to HOLD  the SHIFT key while doing it.

Create a .URL file

Open the desired web page in Internet Explorer then hold the shift key and click drag the item in the address bar of Internet Explorer to the desired location on the computer (Desktop, Folder, Shared Drive). 
Enable .Net Framework 3.5 SP1 on Windows Server 2012

Add .Net Framework 3.5 SP 1 to Windows Server

The .Net Framework feature 3.5 is not installed with Windows 2012 or Windows server 2012 R2 operating systems. Some applications require Framework 3.5 installed as a prerequisite. such as VMware vCenter 5.5.  Some application installers will install the feature during the installation of the application. You can however install the .Net Framework Feature manually. The option to install it as a feature feature is grayed out. The grayed option to install .Net Framework feature is bewildering because it is listed to be installed but not available and Grayed out.

 Enable .Net Framework 3.5 SP1 on Windows Server 2012 R2

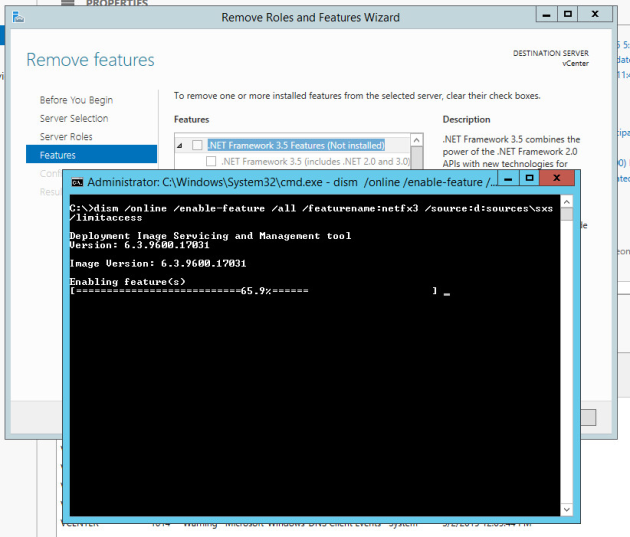
I used the following instructions and the screen shots were from the actual installation of .Net Framework feature on Windows 2012 R2.

 The option to install .NET Framework 35 on Windows 2012 and Windows Server 2012 R2 server is grayed out.

Enable .Net Framework 3.5 SP1 on Windows Server 2012

Enable .Net Framework 3.5 SP1 on Windows Server 2012

To install .NET Framework on widows Server 2012, for example as a pre-requisite for VMware vCenter 5 and VMware vCenter 5.5, run the following command to install .NET Framework 3.5 SP1. it will install .NET Framework 3.5 SP1 on Windows 2012 server when the option to do so from the features and Roles server management snap-in is grayed out.

Follow these steps to enable .Net Framework 3.5 SP1 in Windows Server 2012 , they worked for me when installing .NET Framework as a pre-requisite to vCenter 5.5 U2.

1. Open a Command Prompt window with Administrator Privileges

2. type: dism /online /enable-feature /all /featurename:netfx3 /source:d:sources\sxs /limitaccess

Change the “d” in the command to match the drive letter of your DVD/CD drive os the virtual drive that has the Windows Server 2012 DVD ISO mounted.

B2QRQRHU8DYJ

 B2QRQRHU8DYJ


Hello world!

Welcome to WordPress.com. After you read this, you should delete and write your own post, with a new title above. Or hit Add New on the left (of the admin dashboard) to start a fresh post.

Here are some suggestions for your first post.

  1. You can find new ideas for what to blog about by reading the Daily Post.
  2. Add PressThis to your browser. It creates a new blog post for you about any interesting  page you read on the web.
  3. Make some changes to this page, and then hit preview on the right. You can always preview any post or edit it before you share it to the world.